Step-by-step instructions on adding an NVMe M.2 SSD drive to your Home Assistant Yellow with an existing Home Assistant installation.
Prerequisites
-
Home Assistant Yellow, powered off
-
Administrator rights on Home Assistant
-
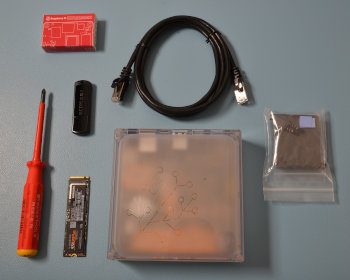
Additionally, make sure you have the following items
- NVMe M.2 SSD drive
- No. 1 hex screwdriver
Opening the case

Risk of damage to the equipment due to electrostatic discharge.
Grounding protects the components from the static electricity that can be naturally present (electrostatic discharge, ESD).
- Always: Touch the working surface before touching electronics.
- Ideally: Use ESD protective equipment, such as ESD table mats and grounding cords.

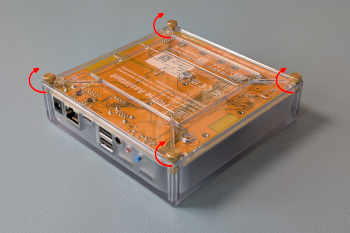
- Remove the 4 screws on the bottom of the Home Assistant Yellow Kit.
- Keep the thumb screws close by; you will need them again later.

- Make sure the interfaces are facing towards your left.
- Flip the case over.
- Slightly lift off the enclosure on your left.
- Slide the enclosure off towards your right.
Installing the NVMe drive
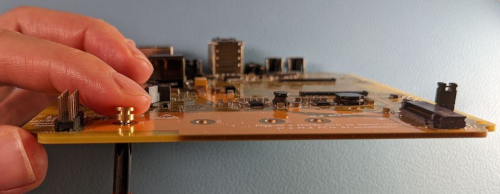
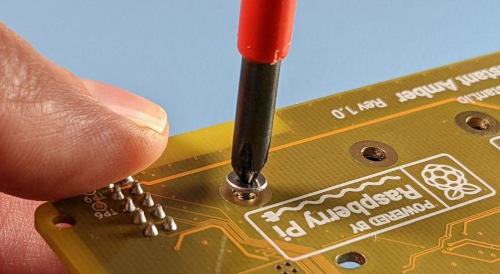
- Unscrew the stand-off nut.
Risk of damage to the equipment due to electromagnetic discharge (ESD)
- Do not touch the gold connector pins
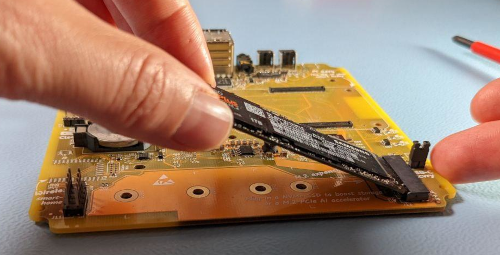
- Carefully hold the NVMe M.2 SSD by the long sides.
- Align the notches in the SSD with the ridges in the slot.
- Then, insert at a ~30-degree angle.
- Do not force the connection.
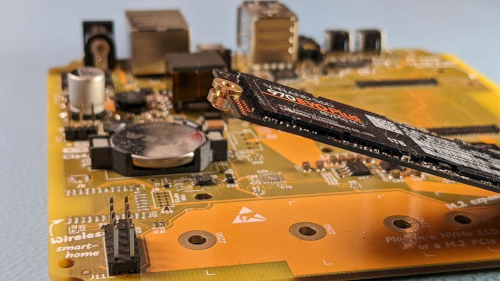
- Slide the stand-off nut into the dent at the end of the SSD drive.
- Make sure the thinner end of the nut is on top.
Risk of damage to the equipment due to excessive force
- Do not over-tighten the screws.
- Press the stand-off nut and the SSD drive against the board.
- While pressing down the drive, turn over the board.
- From the rear side of the board, insert the M2 hex screw.
Reassembling your Home Assistant Yellow
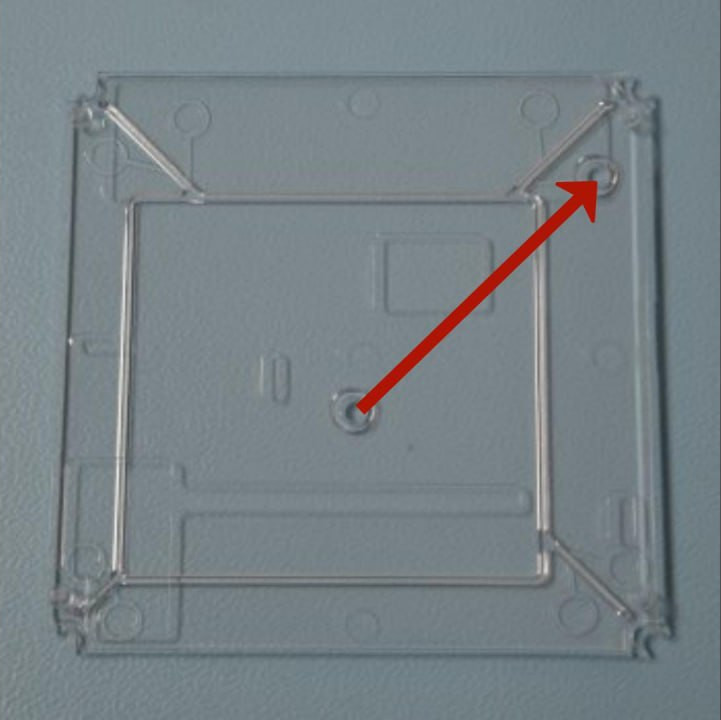
- Place the translucent bottom part of the case onto the table.
- Make sure the two round notches form a line pointing towards the top right corner.
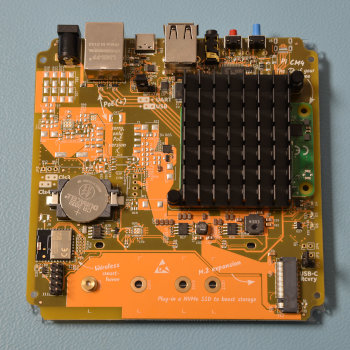
- Place the board onto the bottom part of the case.
- Make sure the USB connectors are facing upwards, away from you.
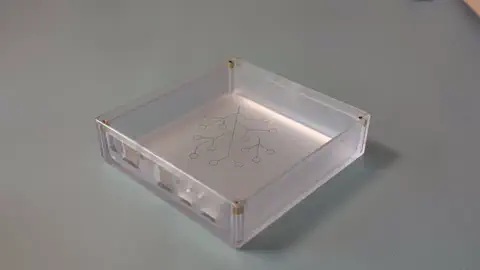
- Turn the enclosure upside down.
- Then, slide the push buttons into the openings of the case.
Risk of damage to the equipment due to excessive force
- Do not over-tighten the screws.
- Insert the 4 thumb screws.
Moving the data disk
-
CM4 or CM5 Lite: If you have a Raspberry Compute Module 4 Lite: As there is no eMMC flash, you can skip this and the following steps.
-
Regular CM4 or CM5 modules: This moving your data procedure is required for making use of your SSD, even if your module is new.
-
In Home Assistant, go to Settings > System > Storage
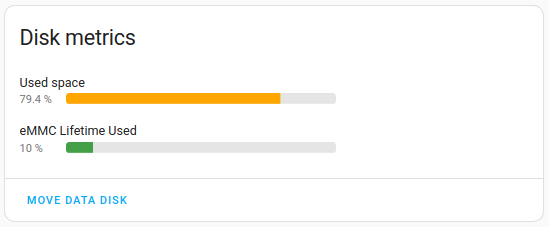
- Select Move datadisk.
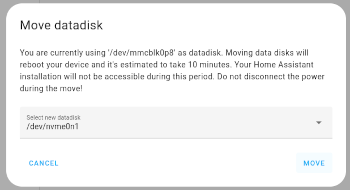
- Select your NVMe drive. If it does not show the full name of your disk, select nvme0n1 and select MOVE.
-
Info: For a small instance of 5 GB (incl. 6 apps (formerly known as Home Assistant add-ons)) this takes about 5 minutes.
- Depending on the size of your instance, this may take 30 minutes or longer.
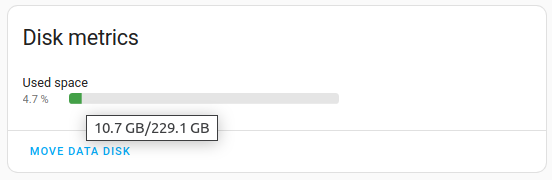
- Once the transfer has been completed, hover over the status bar to see how much free disk space there is available.
- Note that the eMMC section has disappeared.
Related topics
Edit this article on GitHub