Prerequisites
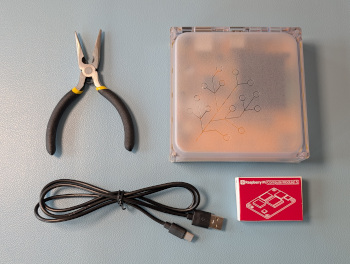
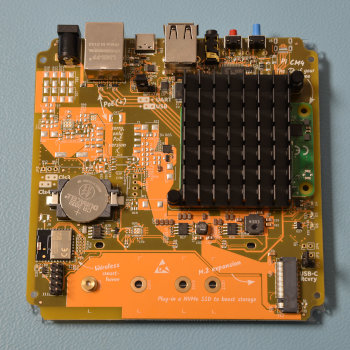
- Home Assistant Yellow installation with NVMe SSD drive and CM4
- Ethernet cable
Additionally, make sure you have the following items which are not part of the Kit
- Raspberry Pi Compute Module 5 (CM5)
- USB-C cable
- Heat sink: You can use the heat sink shipped with Yellow.
- If you want, you can also use the Raspberry Pi Compute Module 5 Passive Cooler.
-
Note: the Raspberry Pi Compute Module 5 Active Cooler is not supported on Home Assistant Yellow.
- There is no fan plug providing the required 5V and PWM signals.
- If you are using PoE, make sure your router or switch provides PoE on that port
- Optional: Power supply (12 V / 2 A, if PoE is not used)
- Flat nose pliers
Preparing the migration
- Make sure you installed Home Assistant Operating System version 14 or later.
- Make sure you have created a backup.
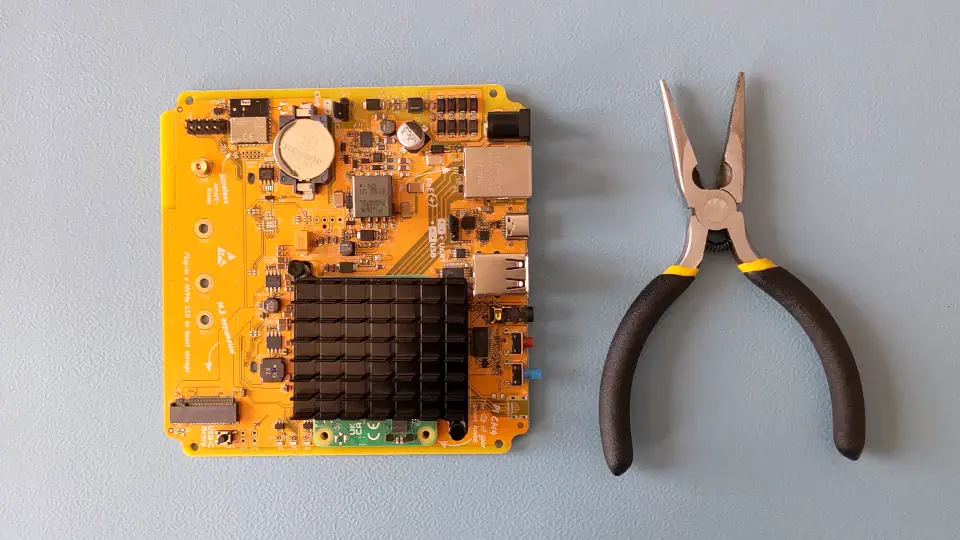
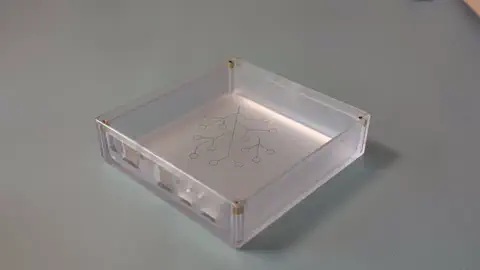
Opening the case

Risk of damage to the equipment due to electrostatic discharge.
Grounding protects the components from the static electricity that can be naturally present (electrostatic discharge, ESD).
- Always: Touch the working surface before touching electronics.
- Ideally: Use ESD protective equipment, such as ESD table mats and grounding cords.

- Remove the 4 screws on the bottom of the Home Assistant Yellow Kit.
- Keep the thumb screws close by; you will need them again later.

- Make sure the interfaces are facing towards your left.
- Flip the case over.
- Slightly lift off the enclosure on your left.
- Slide the enclosure off towards your right.
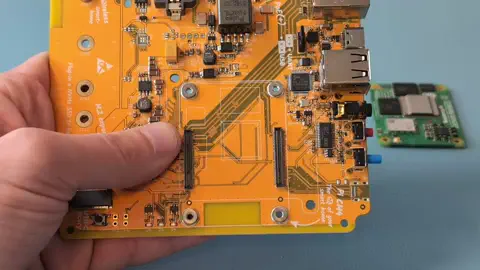
Removing the Raspberry Pi Compute Module 4
- Use the pliers and squeeze the front of the pin so that it fits through the hole.
- Repeat the procedure for the other pin.
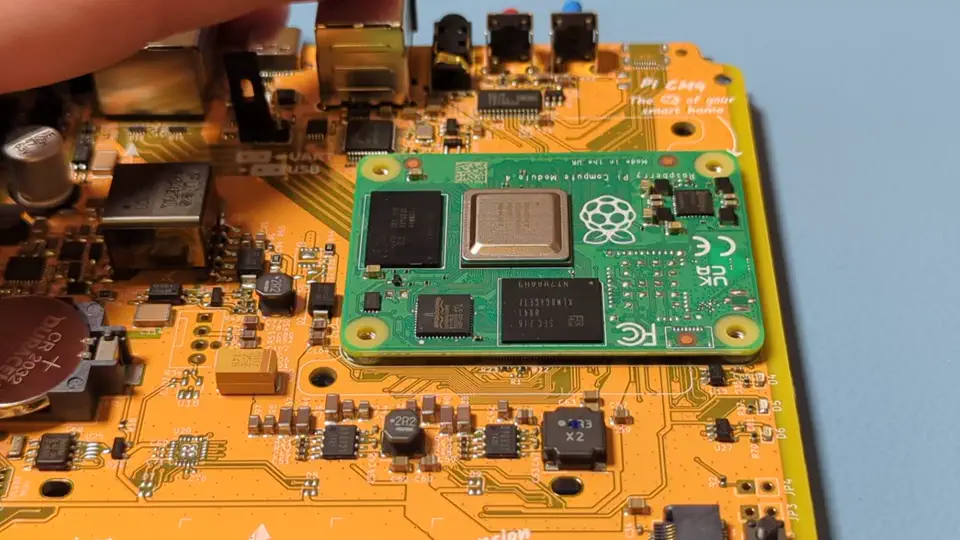
- Do not use a screwdriver as a lever. It might damage the board.
Tilting can damage the connector
-
To avoid damage to the module, ideally, the module should be pulled up vertically. But this is hard to do.
-
Pull up the module from one side, tilting as little as possible. Tilting can damage the connector.
-
This requires quite a bit of force. If it does not work, pull harder.
- Remove the Raspberry Pi Compute Module.
- The image shows a Raspberry Pi Compute Module 4. The steps are the same for the Compute Module 5.
Seating the Raspberry Pi Compute Module 5
Risk of damage to equipment
- Only use the screws that came in the bag labelled CM5.
- If you're box did not contain a bag with screws for the CM5, don't use any screws to fix the module in place
- The other screws can damage the CM5 module.
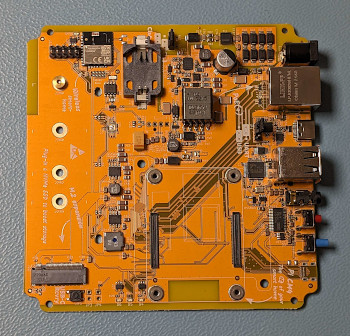
- Place the board in front of you, the connectors facing to the right.
- Orient the CM5: the Raspberry Pi text needs to be on the right hand side.
- Carefully place the CM5 without force.
- The CM5 should fall into place slightly when correctly aligned.
-
Press the CM5 board onto the board-to-board connectors until it clicks into place.
-
Make sure you press on both sides (the two long edges).
- This requires quite a bit of force.
- If you don't hear a loud click, it is most likely not fully seated.
- Note: It has been reported that on some boards, there is no click sound when pressing the module onto the board. It can still be seated correctly.
-
Do a visual check to make sure the CM5 is installed correctly.
- It needs to run parallel to the Home Assistant Yellow board.
- You can also pull a bit on the sides to make sure it is not loose.
-

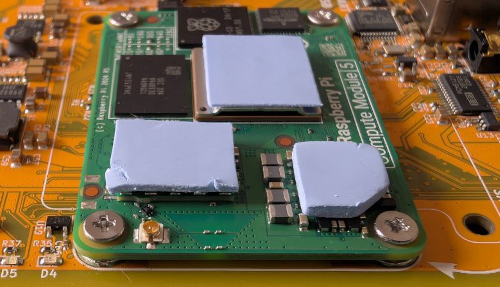
- If your Yellow came with a plastic bag labelled CM5, containing screws and heat pads, place those heat pads on the CM5.
- Align the pads as shown in the image.
- Make sure that the pad with the cut off corner is placed so that there is room for the screw.
Risk of damage to equipment
- Only use the screws that came in the bag labelled CM5.
- If you're box did not contain a bag with screws for the CM5, don't use any screws to fix the module in place
- The other screws can damage the CM5 module.
- If the packaging included a plastic bag labelled CM5 with screws and heat pads, you have the option to screw the CM5 module in place.
- Screws are optional and can help keep the Compute Module in place during transportation.
- Use a No 1 crosshead screwdriver.
- Be careful not to overtighten the screws.
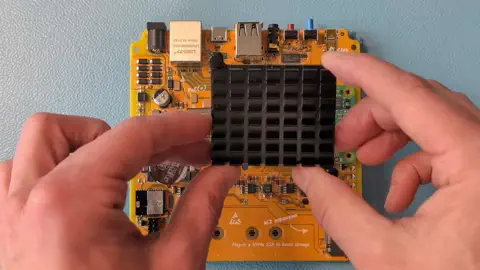
- Push the 2 plastic push pins into the dedicated hole on the heat sink.
- Start by first aligning the right plastic push pins into the dedicated hole on the carrier board.
- Then, place the heat sink onto the module.
- Take the entire board off your workplace and push the pins firmly through the carrier board.
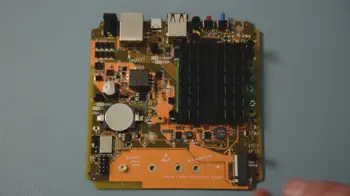
- Ensure that the module is still fully seated after securing the heat sink.
Installing and running rpiboot

- rpiboot is a command line utility for booting a Raspberry Pi in USB device mode. This is needed because the CM5 cannot boot from the USB 2.0 ports of the Yellow.
- Install rpiboot on your PC.
- Windows: Download and run the Windows Installer from Raspberry Pi GitHub.
- macOS or Linux: Install from source code.
- Install rpiboot, but do not run it yet!
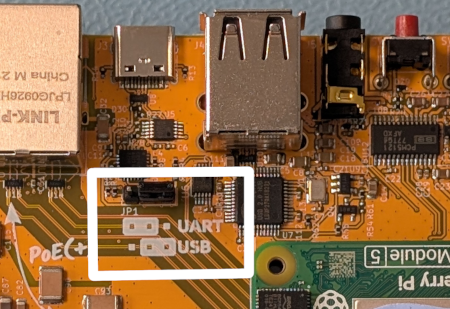
- On the Yellow board, make sure the JP1 jumper is set to USB.
- It may be there by default, but it is worth to double-check.
- Plug-in a USB-C cable to Home Assistant Yellow and connect it to your PC.
- Make sure the cable supports USB 2.0 data.
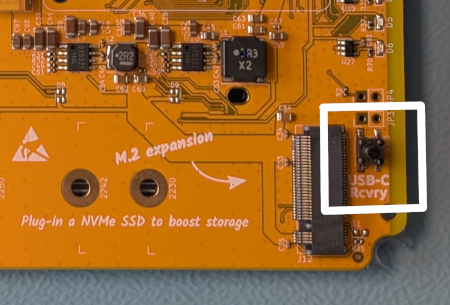
- On the Yellow board, press and hold the recovery button.
- Older Home Assistant Yellow versions: Bridge JP2 (USB-C Rcvry).
- Power up the board.
- Plug in the 12 V DC connector or Ethernet cable (if PoE is used).
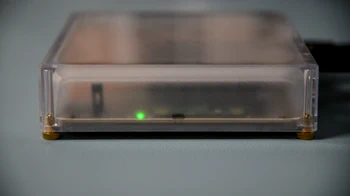
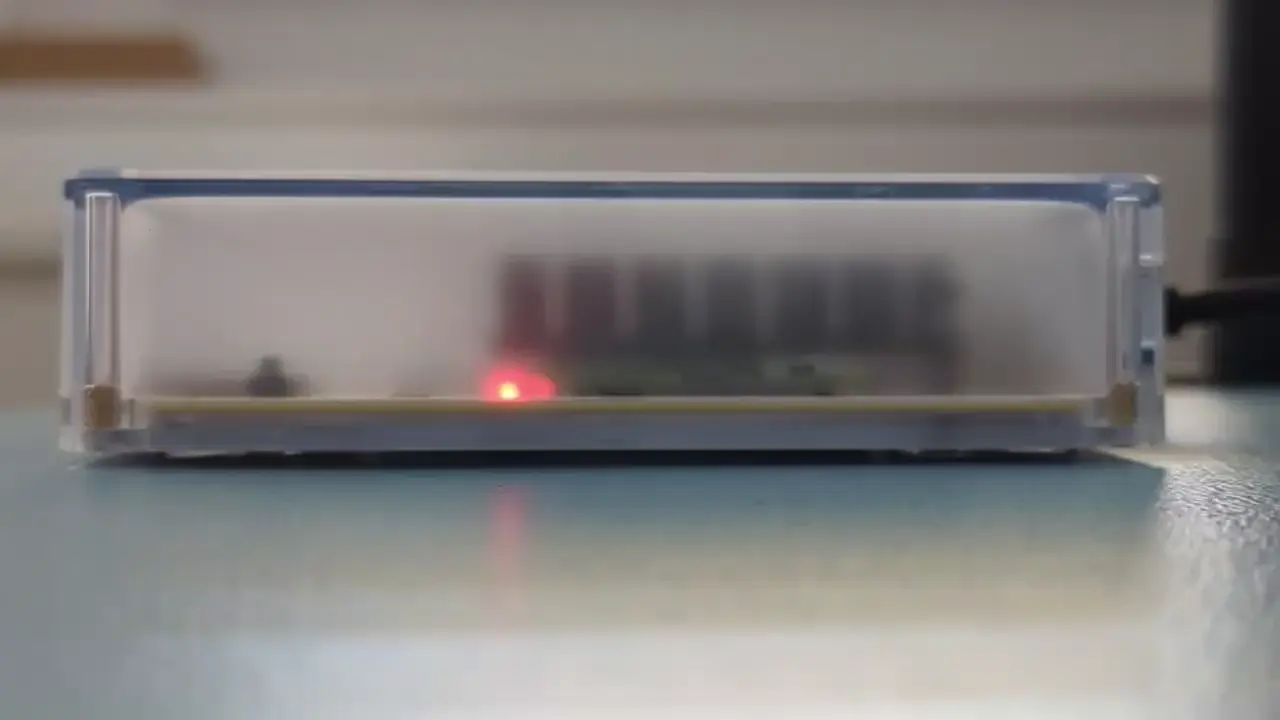
- Only the red LED should be on at this point (solid, not blinking).
- Release the recovery push button.
- Older Home Assistant Yellow versions: Un-bridge JP2.
-
On your PC, run rpiboot and let it run through.
-
If you are using Windows, run "rpiboot-CM4-CM5 - Mass Storage Gadget" from the start menu. It might ask you if you want to reformat the disk. Select Cancel each time.
-
If you are running an Apple Silicon mac, before running
rpiboot, make sure you open the terminal using the “Rosetta” compatibility mode. -
If you are using Linux or macOS, use the following command to run the tool.
sudo ./rpiboot -d mass-storage-gadget64
-
-
After a few seconds, the yellow LED on the Yellow board should start blinking.
-
Afterwards, only the green LED should be on.
-
The module is now ready to have the Home Assistant Operating System installed on it (next steps).
-
Troubleshooting: If this step didn't work, remove power from the system and repeat step 3.
Installing the Home Assistant OS using Raspberry Pi Imager

- Install the Raspberry Pi Imager on your computer as described under https://www.raspberrypi.com/software/
- Info: If your platform doesn't support the Raspberry Pi Imager, you can use another imager (for example, balenaEtcher) and flash the Home Assistant OS Installer for Yellow directly from GitHub releases.
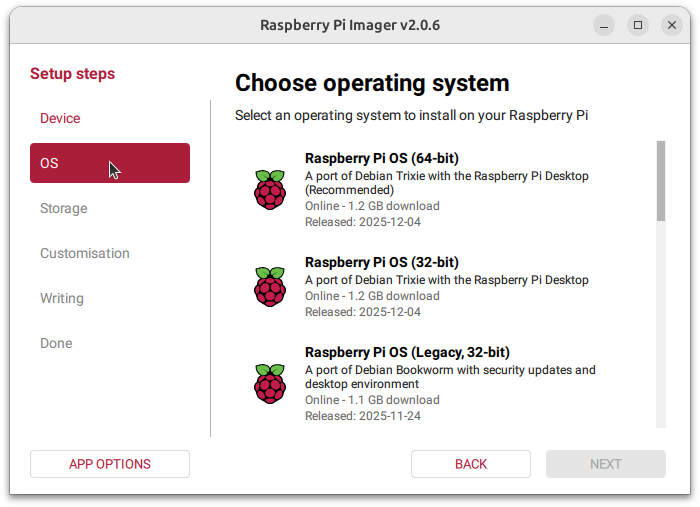
- Under Setup steps, select OS.
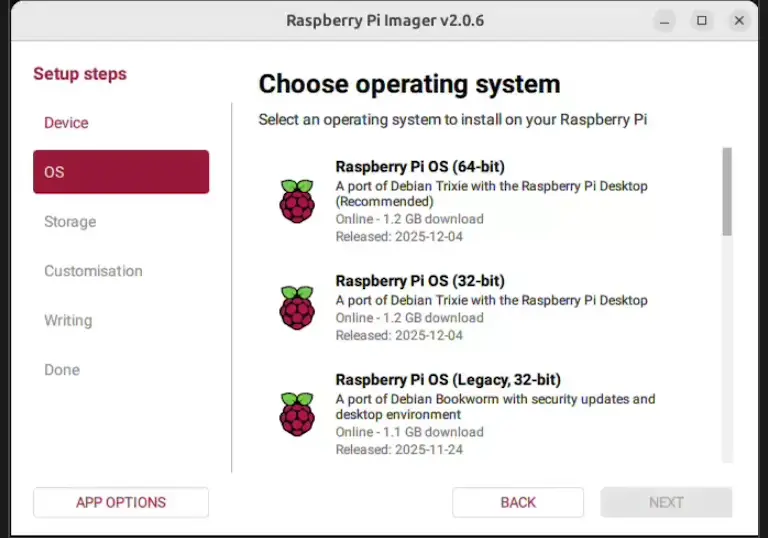
Choose the operating system:
- Choose Other specific-purpose OS.
- Choose Home automation.
- Choose Home Assistant.
- Choose Home Assistant OS x.y (Yellow).
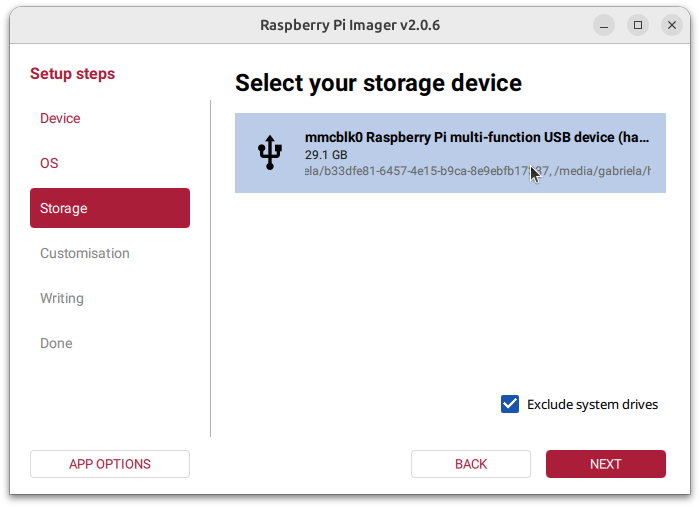
- Under Storage, select your Raspberry Pi module.
- Select Next.
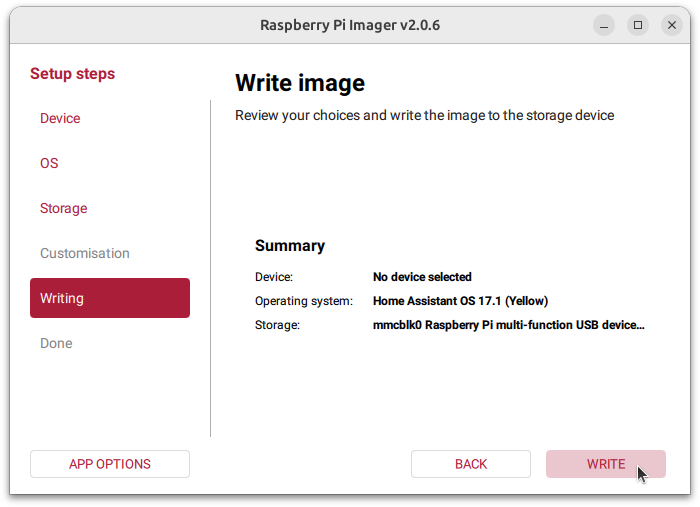
- Select Write to start the process.
- Wait for the Home Assistant OS Installer to be written to the internal eMMC storage on your module.
- Follow the wizard.
- When the steps are complete, close the rpi-installer.

- Unplug the USB cable.
- Unplug the power cable.
- Set the JP1 jumper to UART.
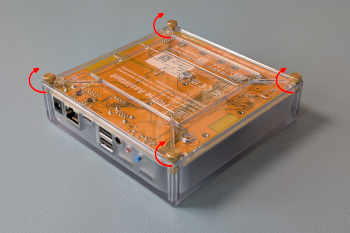
Reassembling your Home Assistant Yellow
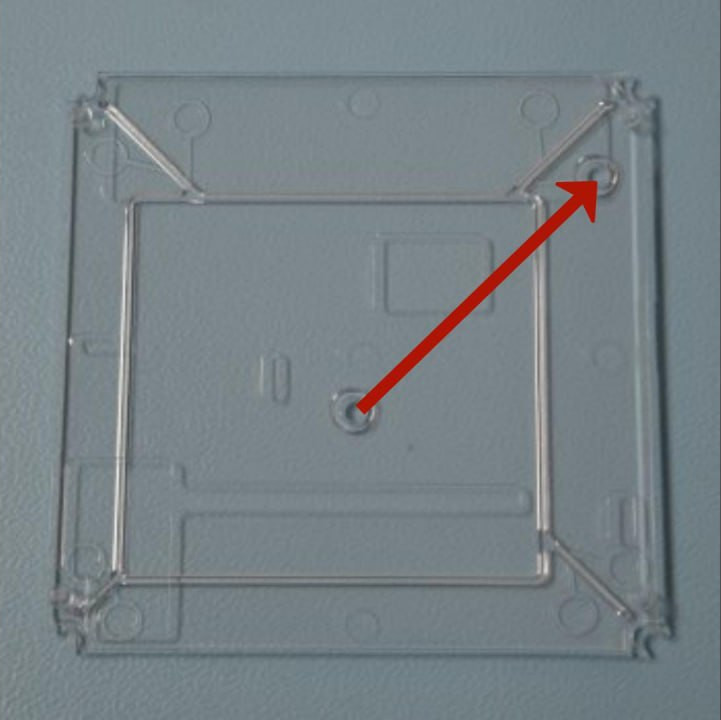
- Place the translucent bottom part of the case onto the table.
- Make sure the two round notches form a line pointing towards the top right corner.
- Place the board onto the bottom part of the case.
- Make sure the USB connectors are facing upwards, away from you.
- Turn the enclosure upside down.
- Then, slide the push buttons into the openings of the case.
Risk of damage to the equipment due to excessive force
- Do not over-tighten the screws.
- Insert the 4 thumb screws.
Powering up and finishing the migration
- Plug in your Ethernet cable and make sure it is locked into place.
- The other end of the Ethernet cable will need to be connected to your router or switch and connected to the internet.
- If you are not using PoE, connect the power to the wall and then to the Home Assistant Yellow.
Notice: Initial startup may take a while, depending on your internet connection.
-
Open Home Assistant.
Mobile: Confirm the IP address detected by the app. For example
http://192.168.1.196:8123Desktop: Visit http://homeassistant.local:8123 to access the Home Assistant user interface.
-
As your data is stored on the NVMe, your dashboard comes up as usual. No additional steps required.
Related topics
Edit this article on GitHub